Heavy rain exposes weak window detailing faster than ordinary showers. Water gathers on sills, enters cracked sealant, and follows tiny gaps behind the frame. This is why homeowners and builders need a practical answer to “How to waterproof window frames during heavy rain seasons,” rather than relying on thicker caulk alone.
The World Meteorological Organization reports that heavy precipitation events are becoming more frequent or intense in many regions. The U.S. Department of Energy also identifies windows as important paths for air and moisture movement. Industry testing standards, including ASTM E331, evaluate window assemblies against water penetration under pressure. These findings support a layered approach: inspect the frame, repair damaged joints, maintain drainage paths, and install flashing correctly. A dry-looking interior does not prove the assembly is protected.
Building scientist Dr. Joseph Lstiburek has often stated, “There are two types of water: liquid water and water vapor.” His point matters during prolonged storms. Liquid water can enter through failed seals, while vapor can remain trapped inside wall cavities. Both require different controls. In practice, a professional may find a blocked weep hole, a loose corner joint, or sealant applied over dirt. Small details matter.
Perfect waterproofing is not a realistic promise. Even experienced installers can miss hidden damage. However, careful inspection and documented repairs reduce risk. A flashlight, moisture meter, compatible sealant, backer rod, and properly integrated flashing can make the difference between a temporary patch and durable rain protection.
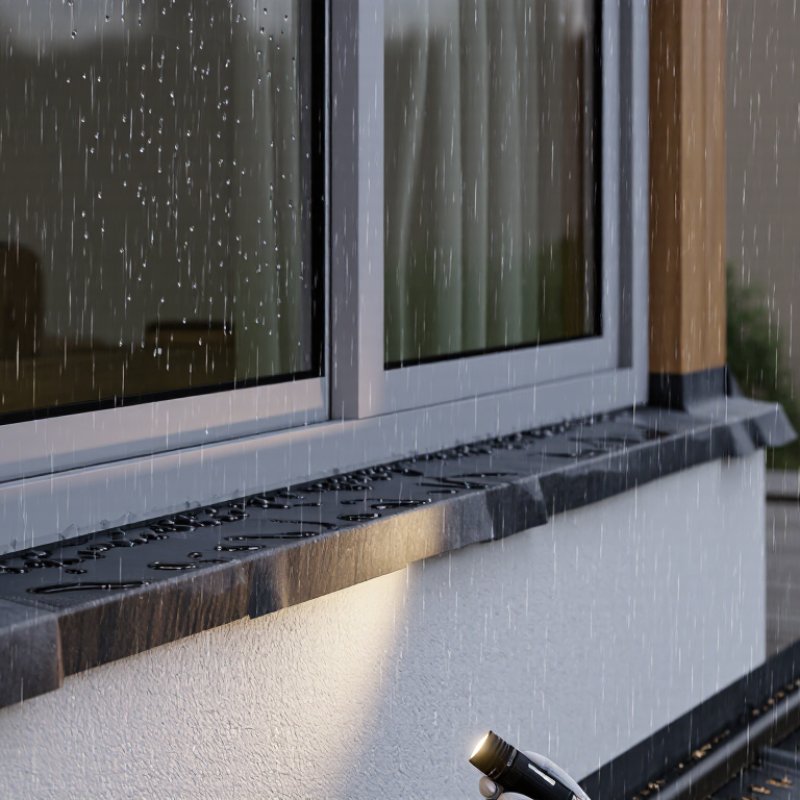
Heavy rain tests every joint around a window frame. Waterproofing is not merely cosmetic protection. It controls water entry, air leakage, and hidden wall damage. The U.S. Department of Energy reports that windows can account for 25–30% of residential heating and cooling energy use. Poorly sealed frames may increase that burden. Small gaps matter. Water finds weakness.
During field inspections, staining often appears below the leak, not beside it. Moisture can travel through sill joints, insulation, and interior finishes. The U.S. Environmental Protection Agency advises drying wet materials within 24–48 hours to reduce mold risks. A damp sill may look harmless today. It can smell musty later. This is where waterproofing becomes a health and maintenance concern, not just a construction detail.
Effective protection combines sloped sills, functional drainage paths, durable flashing, and carefully applied sealants. Weep holes must remain open. Blocking them can trap rain inside the frame. Industry fenestration guidance also emphasizes testing assemblies under simulated wind-driven rain. The uncomfortable truth is that sealant alone cannot correct poor installation. I have seen attractive repairs fail because water had no exit route. Inspection should include corners, fastener points, and the wall connection. Weather changes quickly, while hidden moisture damage develops quietly.
During heavy rain, water rarely attacks a window frame head-on. It follows gravity, wind pressure, and tiny construction gaps. At the sill, failed sealant can funnel water behind the frame. Blocked weep holes then trap moisture inside the cavity. Capillary action pulls water through narrow joints. I have seen staining begin beneath apparently sound interior trim. The visible leak was not the entry point. That misdiagnosis is common.
The Whole Building Design Guide identifies continuous flashing and drainage paths as critical defenses against water intrusion. ASTM E1105 also evaluates window leakage under controlled water spray and pressure, but real storms are less orderly. Wind can push rain behind loose cladding or a poorly sealed frame perimeter.
Wet insulation loses performance, while metal fasteners may corrode and timber components can swell. EPA guidance warns that mold may develop on wet materials within 24 to 48 hours. A small delay matters. The U.S. Department of Energy estimates that windows account for about 25–30% of residential heating and cooling energy use, so damaged frames can increase both moisture risk and energy loss. A neat bead of caulk may create false confidence. The surrounding wall, not the frame, may be the true path.
Heavy rain tests more than the glass. It exposes weak seals, poor drainage, and badly joined frame corners. In field inspections, water often appears near the sill before anyone notices the real cause. A reliable frame should use durable materials, such as uPVC, fiberglass, or aluminum with a thermal break. EPDM gaskets can maintain flexible seals during temperature changes. Welded or mechanically reinforced corners also reduce movement and leakage risks.
Good design matters as much as material choice. Look for sloped sills that guide water outward, protected drainage channels, and correctly sized weep holes. These openings must remain clear after installation. A deep frame profile can provide extra protection from wind-driven rain, but it may fail if the flashing is poorly fitted. I once underestimated the importance of sill alignment. A small installation error created standing water after a short storm.
Tips: Check seals twice yearly. Keep drainage holes clear. Press gently around corners and joints. If the gasket feels brittle, replace it early. Waterproofing is never only a product feature. It depends on accurate measurements, careful installation, and regular inspection. No frame is perfect. Even strong materials need attention when weather becomes severe.
Why Waterproof Window Frames During Heavy Rain?
Step-by-Step Methods for Improving Window Frame Waterproofing
Heavy rain tests every joint around a window frame. Water may enter through cracked sealant, loose flashing, or poorly sloped sills. Field inspections often reveal stains before owners notice active leaks. The safest approach is careful, step-by-step work.
Start by checking the interior wall below the window. Soft paint, dark marks, or swollen trim can indicate trapped moisture. Outside, inspect the frame, sill, drainage openings, and surrounding wall. Remove failed sealant with a plastic scraper. Clean dust and allow the surface to dry fully. Wet surfaces reduce adhesion. Next, repair visible cracks and confirm that drainage openings remain clear. Apply exterior-grade sealant in a continuous bead. Press it firmly into each corner. Do not block the frame’s drainage paths. Then inspect the flashing above and beside the frame. Replace damaged sections rather than covering them. A quick patch may look neat, but it can hide a larger failure.
Tips: Work during dry weather. Use a moisture meter when possible. Test the repair with gentle water flow, not a powerful spray. Check indoors afterward. Small details matter. I once underestimated a narrow corner gap; it caused fresh staining after the next storm. Waterproofing also needs periodic review, because sealant can shrink, split, or detach over time.
| Step | Waterproofing Area | Recommended Method | Typical Materials or Tools | Practical Performance Target | Inspection and Verification |
|---|---|---|---|---|---|
| 1 | Initial condition assessment | Inspect the frame, sill, joints, drainage paths, interior finishes, and surrounding wall for cracks, staining, or failed sealant. | Flashlight, moisture meter, inspection mirror, camera | Identify all visible water-entry paths before repair; do not seal over active moisture or concealed deterioration. | Record damaged areas and moisture readings. Investigate whether water is entering at the frame, perimeter joint, sill, or wall above the window. |
| 2 | Window sill drainage | Maintain a sloped sill that directs water toward the exterior. Keep sill channels and weep openings clear. | Level, straightedge, non-metallic cleaning tools | A common practical target is an outward fall of approximately 5–10° where the sill design allows it. Follow the approved design and local code. | Pour a small amount of clean water onto the sill and confirm that it flows outward rather than toward the interior. |
| 3 | Surface preparation | Remove loose sealant, dust, oil, rust, and deteriorated coatings. Dry the bonding surfaces before applying new materials. | Plastic scraper, brush, compatible cleaner, clean cloth | Bonding surfaces should be sound, clean, and free of standing water. Avoid damaging factory-applied finishes or drainage slots. | Wipe the joint and inspect for residue, powdering surfaces, gaps, or movement that could prevent proper adhesion. |
| 4 | Perimeter joint sealing | Apply a continuous exterior-grade sealant joint around the frame, concentrating on corners and transitions between dissimilar materials. | Weather-resistant elastomeric sealant, backer rod, masking tape, caulking gun | Use a properly tooled, continuous bead with no pinholes or breaks. Use backer rod where the joint is deep enough to require controlled sealant depth. | Check both upper corners, lower corners, frame-to-wall transitions, and any joints that have opened because of building movement. |
| 5 | Flashing at the sill | Install or repair sill flashing so water is directed outward and cannot bypass the frame into the wall assembly. | Self-adhered flashing membrane or formed metal flashing, compatible primer, roller | Flashings should be fully bonded, wrinkle-free, and integrated with the surrounding water-resistive barrier according to the construction details. | Confirm that the flashing turns up at the sides or includes end dams where required, while preserving the exterior drainage route. |
| 6 | Head and jamb protection | Ensure the side and head flashing layers overlap in a shingle-like sequence so upper water-shedding layers drain over lower layers. | Flashing tape or sheet flashing, compatible sealant, measuring tape | Use the overlap dimensions specified by the flashing manufacturer, project drawings, or local code. Do not create reverse laps that can trap water. | Visually trace the drainage path from the top of the window to the exterior and verify that each layer sheds water over the next layer. |
| 7 | Fasteners and frame alignment | Replace corroded or loose fasteners and confirm that the frame is square, plumb, and not distorted by over-tightening. | Level, square, corrosion-resistant fasteners, torque-controlled driver | The frame should remain aligned, operate smoothly, and maintain consistent gasket or seal contact without excessive compression. | Open and close the sash or panel, inspect gasket continuity, and check that fastener penetrations are sealed where exposed to weather. |
| 8 | Weep and drainage-path maintenance | Clear weep holes, sill channels, and exterior drainage slots. Never permanently block them with sealant, paint, or insulation. | Soft brush, plastic pick, low-pressure air, clean water | All designed drainage openings should remain open and unobstructed so collected water can exit the frame. | Perform a controlled water check and observe whether water exits through the intended exterior openings. |
| 9 | Sealant curing and weather exposure | Protect newly applied sealant and flashing from rain, condensation, dust, and movement during the stated curing period. | Temporary weather protection, warning signage, curing instructions | Follow the product data sheet for minimum application temperature, allowable moisture conditions, and cure time; curing varies by product and weather. | Check for tackiness, shrinkage, bubbles, adhesion loss, or washout before exposing the joint to heavy rain. |
| 10 | Controlled water test | Test the window from the lowest area upward using a gentle, controlled spray rather than a concentrated high-pressure jet. | Hose with adjustable spray nozzle, timer, absorbent paper, moisture meter | No water should appear on interior surfaces, insulation, or adjacent finishes during the test period specified by the project procedure. | Test one section at a time, monitor the interior, and allow enough time for delayed leakage to become visible before moving upward. |
| 11 | Post-rain monitoring | Inspect the interior and exterior after the next significant rain event and compare results with the initial condition assessment. | Inspection checklist, camera, moisture meter | No recurring staining, dampness, bubbling paint, musty odor, or rising moisture readings around the opening. | If leakage remains, avoid adding more surface sealant until the actual entry path and the wall drainage design have been reassessed. |
| Important: Waterproofing details vary by window type, wall construction, climate, and local building requirements. Product compatibility, flashing sequence, sealant joint design, and water-testing procedures should be confirmed against the applicable project specifications and manufacturer instructions. | |||||
After heavy rain, inspect window frames before moisture marks disappear. Use a dry cloth around the sill, corners, and interior edges. Dark spots, peeling paint, or a musty smell may indicate hidden water entry. Open the window and check the frame joints with a flashlight. Look for cracked seals, loose fasteners, and blocked drainage holes. Small details matter.
Pour a small amount of water on the exterior sill, never into the frame directly. Watch whether it flows away from the wall. Water that pools near the glass may signal poor drainage or an uneven installation. A tissue pressed against the inner sill can reveal a slow leak. For uncertain cases, use a moisture meter and record the reading. I once missed a tiny corner gap because the frame looked completely dry. That mistake was costly.
Clean drainage channels with a soft brush and remove leaves or grit. Do not enlarge the holes or force sharp tools into them. Replace hardened or separated sealant with a compatible exterior-grade product. Check the seal after it cures, especially around corners. Avoid painting over drainage openings. If leakage continues, consult a qualified window professional, because the problem may involve flashing or surrounding masonry. Maintenance is not perfect. Weather can expose weaknesses that a quick inspection misses.
Heavy rain tests frame joints, seals, flashing, and drainage paths. Small gaps can admit water and outside air. A damp sill can worsen.
Water may appear below the real leak, especially beneath the sill. It can travel through joints, insulation, and wall finishes. The visible stain may mislead.
Durable options include uPVC, fiberglass, and thermally improved aluminum. Flexible gaskets help maintain seals during temperature changes. Material alone is not enough.
Sloped sills should guide water outward. Clear weep holes, protected drainage channels, and properly fitted flashing are also important. Water needs an exit route.
No. Sealant cannot correct poor installation, blocked drainage, or badly aligned sills. A neat repair may still fail during wind-driven rain. That mistake is easy to make.
Use a dry cloth around the sill, corners, and interior edges. Check for dark spots, peeling paint, cracked seals, and musty smells. Use a flashlight.
Pour a small amount of water onto the exterior sill. Watch whether it flows away from the wall without pooling near the glass. Do not pour water directly into the frame.
Remove leaves and grit with a soft brush. Keep drainage holes open, and avoid sharp tools or paint near them. Do not enlarge the openings.
Replace it when it feels brittle, separates, or shows visible cracks. Use a compatible exterior-grade sealant and inspect it after curing. Check the corners carefully.
Seek qualified help when leakage continues after basic cleaning and sealing. The cause may involve flashing, fasteners, wall connections, or surrounding masonry. A quick inspection can miss hidden moisture.
Waterproofing window frames during heavy rain is essential for preventing leaks, moisture buildup, mold, wood rot, insulation damage, and deterioration of surrounding walls. Rainwater can enter through worn seals, loose joints, damaged flashing, blocked drainage channels, or small gaps between the frame and wall. Over time, repeated exposure may weaken the structure and reduce indoor comfort. Understanding how water travels around a window helps homeowners identify vulnerable areas before serious damage occurs.
This guide explains how to waterproof window frames during heavy rain seasons using practical materials and design features, including durable sealants, weather-resistant gaskets, sloped sills, flashing, and properly fitted drainage paths. It also presents step-by-step methods for sealing gaps, replacing damaged components, improving water runoff, and checking frame connections. Regular inspections should focus on cracks, peeling sealant, clogged weep holes, damp spots, and soft materials. Routine cleaning and timely repairs can extend window life and help maintain a dry, safe, and energy-efficient interior.

Spencer Window