Replacing traditional wood windows with aluminum units is more than a material upgrade. It changes the appearance, maintenance routine, thermal behavior, and installation strategy of a home. The key question is not only how to transition from traditional wood to aluminum windows, but how to protect the building’s character during that change.
Sarah Susanka, FAIA, an architect known for human-centered residential design, has said, “Good design begins with how a home is lived in.” That principle matters here. Aluminum frames may offer slimmer profiles, strong structural performance, and less routine painting. However, they can also feel visually harsh beside old timber siding or ornate trim. The transition should respect both performance and proportion.
Begin with a careful inspection of the existing openings. Look for soft wood, hidden moisture, uneven sills, and previous repairs. Measure each opening separately. Older homes rarely behave perfectly. A replacement window that fits one opening may fail in another.
Choose thermally improved aluminum frames when possible. Ask about thermal breaks, low-emissivity glass, drainage paths, air sealing, and frame depth. These details affect comfort near the glass on cold mornings. They also influence condensation risk.
Keep original interior trim when its condition allows. New aluminum windows can look disconnected without thoughtful casing adjustments. A narrow reveal, exposed fasteners, or mismatched color may seem minor. They are not.
The installation stage deserves special attention. Flashing, shimming, insulation, and sealant must work together. A beautiful frame cannot correct a poorly prepared opening. Sometimes, full replacement is unnecessary; selective repair may preserve valuable wood. That possibility deserves honest consideration before demolition begins.
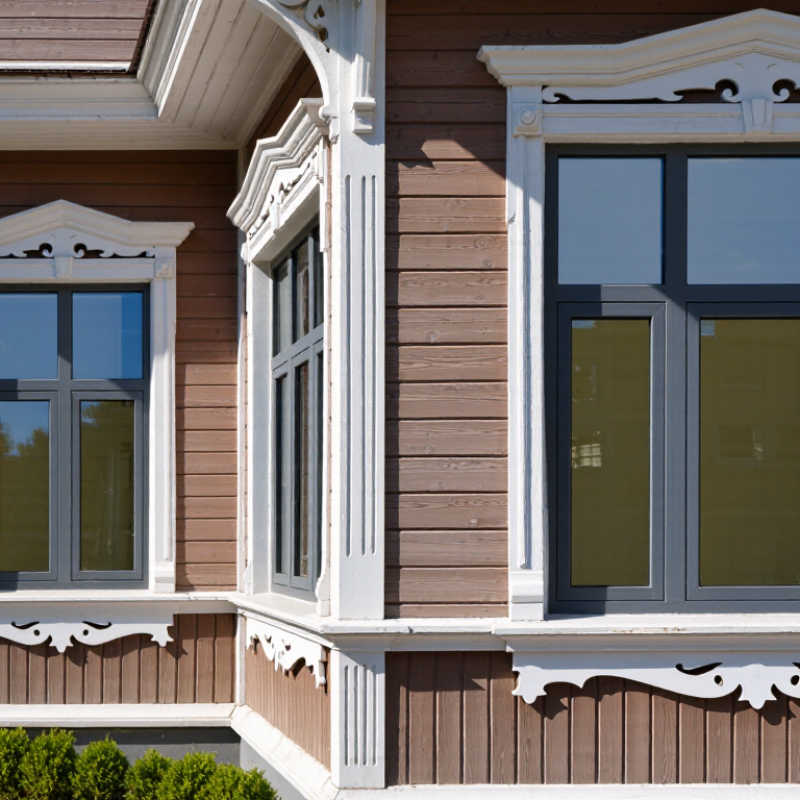
Before replacing wood windows, inspect the opening, not just the glass. Check sills, jambs, trim, and the wall below each window. Soft wood, dark staining, peeling paint, or a musty smell can indicate hidden moisture. Use a moisture meter, probe suspect areas, and photograph the flashing before removal. A quick visual check is not enough.
The U.S. Department of Energy reports that windows can account for roughly 25–30% of residential heating and cooling energy use. This makes accurate planning important. Record each opening’s width, height, squareness, and sill condition. Measure in several places; older wood frames often vary by more than expected. Review the National Fenestration Rating Council label for U-factor and solar heat gain coefficient. Lower U-factor generally improves insulation, while SHGC should reflect the local climate and window exposure.
Aluminum frames can provide strength and slim sightlines, but uninsulated metal may transfer heat quickly. Specify thermally improved frames, suitable drainage paths, and compatible perimeter seals. Confirm that the replacement fits the existing rough opening without crushing insulation or blocking weep holes. Check bedroom egress dimensions and local permit requirements before ordering. I once treated sound-looking trim as proof of a dry wall cavity. It was not. Budget for concealed framing repairs, because replacement estimates often exclude them.
Replacing wood windows with aluminum is not simply a style update. It changes how a room feels, sounds, and manages heat. Start by matching the window style to the opening. Casement windows provide strong ventilation and tight compression seals. Sliding windows save space but may offer less airtight performance. Large fixed panes can frame a garden beautifully, though they do not provide emergency ventilation.
Choose aluminum with a thermal break, especially in regions with cold winters or intense summer heat. This insulated section separates the interior and exterior metal surfaces, reducing heat transfer and condensation risk. Powder-coated finishes resist fading and need little maintenance. Anodized finishes offer a distinct metallic appearance, but scratches can be harder to repair. Consider laminated or low-emissivity glass for improved comfort, quieter bedrooms, and better solar control.
Performance labels deserve careful attention. Review the window’s U-factor, solar heat gain coefficient, air leakage, and water resistance ratings. Local building requirements still matter. A reliable installer should measure the opening, inspect the existing frame, and explain how drainage will work. Small errors become visible on a rainy day.
Aluminum is not flawless. Poorly designed frames can feel cold, collect condensation, or transmit street noise. I have also found that narrow profiles look elegant but may limit glazing choices. The best decision balances appearance, climate, operation, and repair access—not just the lowest quotation.
Before ordering aluminum windows, measure the opening, not the old sash. For replacement units, record width at the top, middle, and bottom. Measure height on the left, center, and right. Use the smallest width and height, then confirm the manufacturer’s required installation clearance. The U.S. Department of Energy reports that windows can account for 25–30% of residential heating and cooling energy use, so a small measuring error can create lasting drafts and energy loss.
I recommend measuring twice, with the tape level and fully extended. Check diagonals too; a difference above about 6 millimeters may indicate a crooked opening. Measure jamb depth, sill slope, and the space needed for flashing. Aluminum frames may expose more masonry or damaged wood than expected. Look for soft timber, staining, loose fasteners, and blocked drainage paths. NFRC rating guidance also shows why the final unit must match the project’s climate and performance needs, not just its dimensions.
Prepare the opening before installation. Remove trim carefully, protect the interior floor, and keep the sill dry. Do not hide rot behind the new frame. I once saw a nearly perfect measurement fail because the sill was out of level. The tape was right. The opening was not. Recheck plumb, square, and drainage after old wood components are removed. Allow space for shims, insulation, and movement without forcing the aluminum frame.
Transitioning from wood to aluminum windows starts with careful removal, not force. The U.S. Department of Energy reports that windows can account for 25–30% of residential heating and cooling energy use. A poorly fitted replacement may erase much of the expected benefit.
Measure the opening before ordering the frame. Check width, height, sill slope, and wall condition at three points. Protect nearby flooring, then remove interior trim with a thin pry bar. Cut through old fasteners, separate the sash, and lift the wood frame out carefully. Keep the opening dry. Scrape loose paint, remove rotten wood, and repair gaps with compatible material. Do not hide moisture damage.
Set the aluminum frame on temporary shims. Confirm it is level, plumb, and square before fastening. A small diagonal mismatch can cause difficult operation later. Apply a sill pan or approved flashing system, then seal the exterior perimeter with a flexible sealant. Install insulation around the frame, but avoid excessive foam pressure. It can bow aluminum members. Choose thermally improved frames where possible; aluminum conducts heat quickly without a thermal break. The frame should drain outward, not trap water inside the wall.
Follow the manufacturer’s tested installation method and local inspection requirements. Professional fenestration standards emphasize fastening, drainage, and air sealing, yet real openings are rarely perfect. That is where judgment matters. Recheck sash movement after each fastener. Finish with interior trim and exterior backer rod where needed. Measure twice. Replace less than planned.
Representative room-temperature thermal conductivity values show why aluminum replacement frames should use a thermal break. Aluminum is highly conductive, while wood and insulating polyamide materials conduct far less heat. Actual window performance also depends on glazing, frame design, installation quality, and air sealing.
New aluminum windows need a careful inspection after installation. Check the frame for dents, gaps, and uneven corners. Open each sash slowly. It should move without scraping or excessive force. Look closely at the perimeter sealant, especially near the sill and exterior corners. Small gaps can admit rainwater and cold air. I once overlooked a tiny opening beneath a sill, and moisture appeared after the first heavy storm. That mistake reinforced the value of inspecting windows in daylight and during rainfall.
Tips: Run your fingers along the frame. Notice drafts. Use a thin tissue near closed edges. Movement may reveal weak seals. Confirm that drainage holes remain open. Never cover them with paint or caulk. If water collects inside the track, ask a qualified installer to check the slope and flashing.
Aluminum frames require less attention than wood, but they are not maintenance-free. Clean the tracks with a soft brush and mild soapy water every few months. Remove grit before it damages rollers. Wipe the frame dry afterward. Inspect sealant twice a year for cracks, shrinking, or separation. Replace failed sealant with a compatible exterior product. Avoid abrasive pads and harsh chemicals, which can dull the finish. Lubricate moving hardware lightly, following the hardware manufacturer’s guidance. A simple maintenance log helps identify recurring problems before they become expensive.
Inspect sills, jambs, trim, and the wall below each opening. Soft wood, dark stains, peeling paint, or musty odors suggest hidden moisture. A quick glance is not enough.
Measure width, height, sill slope, and squareness at several points. Older frames often vary more than expected. Record every measurement carefully.
Choose thermally improved frames with insulated sections between interior and exterior metal. They reduce heat transfer and condensation risk. Low-emissivity or laminated glass may improve comfort and sound control.
Review U-factor, solar heat gain, air leakage, and water resistance ratings. A lower U-factor generally improves insulation. Solar heat gain should match the climate and window exposure.
Casement windows offer strong ventilation and tight compression seals. Sliding windows save space but may seal less tightly. Fixed panes frame views beautifully, but they do not provide emergency ventilation.
Protect the floor, remove interior trim, cut old fasteners, and lift the frame carefully. Keep the opening dry. Repair rotten wood and visible gaps before installation.
Set the frame on temporary shims and check level, plumb, and square. Install suitable sill flashing and preserve outward drainage paths. Avoid excessive foam pressure, which can bow aluminum members.
Yes. Poorly designed frames may feel cold, collect condensation, or transmit street noise. Narrow profiles can also limit glazing choices. I once trusted clean-looking trim. The wall cavity was damp.
How to transition from traditional wood to aluminum windows begins with a careful assessment of the existing frames, including their condition, dimensions, moisture damage, and installation style. This evaluation helps determine whether full-frame replacement is needed and supports a practical plan for the project. Homeowners should then compare aluminum window styles, finishes, glazing options, insulation qualities, ventilation features, and operating designs to match the building’s appearance and performance needs.
Accurate measurements are essential before ordering the new windows, and the surrounding openings should be prepared for a secure, level installation. The replacement process generally involves removing the wood sashes and frames, protecting the wall structure, positioning the aluminum frames, and fastening them according to the project requirements. After installation, each window should be checked for smooth operation, alignment, water resistance, and proper sealing. Regular cleaning, inspection of seals, and prompt attention to minor damage will help maintain the windows’ efficiency and appearance over time.

Spencer Window